My Lathe

After thinking about it for quite a while I finally took the plunge and bought a lathe, I've always liked making things, usually it's with a soldering iron and some electronic components but now I'd like to try my hand at turning metal.
Anyway here are some of my experiences and discoveries, I hope someone finds them useful.
Showing posts with label threading. Show all posts

Tuesday, 6 September 2016

Auto feed rethink

Having used the lathe a few times lately I thought I'd revisit the mod I'd done to stop the autofeed, although it worked, the position that it stopped at was a little unpredictable.
What it needed was a spring tensioned lever that snapped fully off when it hit the stop.
Here's the concept I've come up with, not dimensionally accurate but a starter for ten.


Saturday, 31 January 2015

Mini Lathe DIY Autofeed stop - Part 2

The bracket finally arrived for the auto-feed stop. A friend at work had it done for me, he uses a firm that uses high pressure water jets to cut aluminium, I gave him a 2D CAD file of the shape and they cut it out of a 20mm thick piece of Aluminium using water!

As is normal, for me at least, there were a couple of things that didn't quite fit, the top of the middle upright clashed with the gear for the cross slide travel so I removed 10mm from the top and then the front edge clashed with the back of the half nuts so I made it 5mm thinner.

Original design with material removed
Bracket Clearance
It was apparent that I wouldn't be able to put a securing bolt through the front of the bracket as there was just no clearance from the leadscrew so I drilled and tapped from the rear, you need to put the spanner through the gap in the bed but it works fine and will be less fiddly to tighten once I shorten the bolt.
Access through the bed to tighten the bolt
So, once I got it fitted to the lathe and tightened up it was time to see if it actually worked.

Side view
Front view
I engaged the auto-feed and it slowly moved along and when the lever hit the bracket it disengaged the auto-feed.

Success, it needs a bit more work and tidying up, I want to shape the lever and line it up a bit better and add a long M6 bolt in the hole in the bracket to give me some fine adjustment.

I'm also thinking about adding a spring and a latch mechanism which will fully disengage the lever when it's tripped as it currently stops the auto feed but doesn't fully reset the lever position.

I hope to test it out later with a thread I want to cut, if everything works out I will have succeeded in adding auto feed stop to the lathe with minimal modifications to the lathe itself.

If anyone wants the 3D model I can make it public on tinkercad.com, just ask in the comments.

Thursday, 15 January 2015

Threading Gears - Calculator

Whilst trawling around the net I came across a really useful utility on a Blog written by lathnovice.
Where this utility varied from the others I found was that it came at the problem from the other direction, instead of entering your gear configuration and seeing what the TPI or pitch was you could enter your gears and the pitch or TPI and it then calculated the gears you needed, the position they should go in and even the error in the pitch if you were trying to cut imperial threads on a metric leadscrew.

I purchased one of the 63 tooth gears from arceurotrade hoping to cut imperial threads on my metric lathe and this utility proves that it can be done and the error in dimensions is less than with the standard gears.

And, as usual, I thought to myself "that would really be useful as an app on my phone"

So after looking at the source code and scratching my head for a while I thought the easiest way would be to use Appinventor and create an app that just displays the code in a Web viewer so you can use it off-line.
I reduced the number of gears available and moved some of the info around so it would better fit on a phone screen.
I've checked with the creator and he's happy with this so here are some links.
The source on Appinventor Community Gallery here
The APK file here

Mini Lathe DIY Autofeed stop

Another project for my lathe is a way to stop the auto feed automatically instead of me having to raise the lever myself.
There are a few mod's out there already which address this issue with the mini lathe but they require quite a bit of machining or fabrication of brackets.
I spent some time standing and staring at the lathe trying to come up with some ideas that need the least amount of interference with the lathe and not a lot of machining.

I came up with the idea of adding a second arm to the half nut lever that points downwards when the autofeed is engaged, this would then hit a striker that could be adjusted along the axis of the lathe bed.

The bolt was for testing purposes, I intend to install a shaped lever with a flat surface etc.

The next challenge was to make something that would fit to the lathe and be adjustable and not interfere with the normal use of the lathe.

I thought about a block of wood secured to the control box housing with a length of threaded bar sticking out to hit the lever as it traveled towards the chuck but his meant that I would need 2 or 3 different lengths to cover the range of travel needed.

I considered having something clamped to the lathe bed that would stick out and down to hit the lever but this my get in the way and need to be removed in normal usage.

I settled on a design that would clamp to the underneath of the lathe on one of the longitudinal ribs (can't think what they are actually called !)

Here's some CAD I did whilst working it out. (Done in Tinkercad.com)
Just waiting for the bracket to be made and then we'll see if it works........

Monday, 12 January 2015

Thread Cutting Problem

After owning the lathe for a couple of months an getting used to it I decided it was time to attempt cutting threads, I'd watched loads and loads of YouTube videos on the subject and felt I'd got the basic idea so it was time to give it a go.

I'd bought a quick change toolpost which would allow me to swap the cutting tools without having to shim my tools for their different heights, I went for a Myford type from Warco but it needed a 11.2mm stud whereas mine was only 10mm so it was just the project I needed to try out turning a new toolpost stud to fit.

After changing the gears to get a 1.5mm pitch I found that whenever I engaged the leadscrew it would force the reverse tumbler gears out of mesh without even trying to make a cut...... not good!

After a phone call to Warco and a discussion with the technician I decided to see how difficult to turn the lead screw was and yes it was very difficult to turn, not really possible with my fingers even with the gear removed from the end.
I removed the two cap screws from the right hand bearing and it sprung away from the lathe bed around 10mm, hmmm! I thought I'd found the problem, the leadscrew was not parallel to the lathe bed, something at the other end was out of true.

After removing the leadscrew and inspecting the left hand bearing I noticed that there seemed to be a clash between the bearing and the bracket that hold/adjusts the 'B' and 'C' gears.

Yellow line showing the foul
I removed the bracket completely and enlarged the hole where the clash occurred with the bearing.
Still with the bracket removed, I re-fitted the leadscrew and checked how free it was with both bearings re-fitted, it was still a little stiffer than I thought it should be but easier than with the bracket fitted, whenever I tightened up the right hand bearing it was stiffer to turn so I added a thin shim under the left hand bearing and then it ran freely using my fingers when both bearings were fully tightened down.


After re-assembling the bracket and gears I then aligned the apron by loosening the cap screws and engaging the half nuts then re-tightening, when you engage the half nuts the leadscrew should not move significantly side to side, if it moves upwards the you may want to place a shim between the apron and the cross slide.


The other thing I did was to improve the locating of the leadscrew direction lever, as it had slipped out of the detent so many times it had worn a groove in the casting so I drilled a 3mm hole slightly above the original detent. ****Be careful when drilling into the casting, the drive belt runs under that part of the casting ****

I then turned down part of the plunger to give it a 3mm (just under) parallel section that would go into the new hole and secure the direction lever in place.
The plunger still has the tapered point so it will still work with the other two detents.

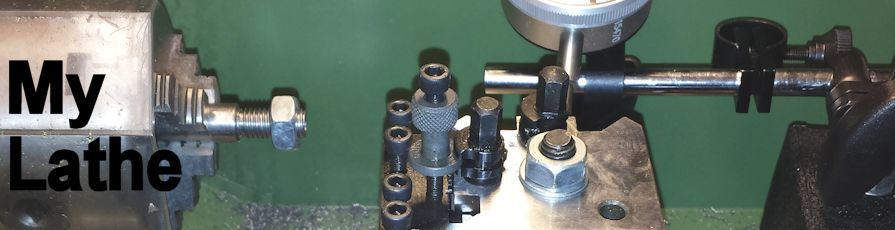
Following these refinements I successfully made an new stud for my quick change toolpost, I also thought the lathe was a bit quieter as well.
New stud for my new toolpost
.